


Below is the GIF of the version after Weaverbird Loop Subdivision

Below is the GIF of the version after Weaverbird Loop Subdivision


Our final one! I was just saying to Ben today, looking at the codes we made for the first project compared to now, we really have come so far everyone! At least I know I have.
Some of you may knew that for my thesis one of goals is create tensile structures out of reconstructed thrifted material, specifically old t-shirts. Around halfway through working on this project, I was able to get the t-shirt pattern I wanted projected onto the umbrella structure I made, but there was nothing special about the code. I wanted the t-shirts to actually be individual meshes that were somehow linked together.
And eventually I got there using kangaroo! It was not without trouble though let me tell you. Twice, I had grasshopper crash on me while doing this because I plugged something into the kangaroo threshold plug, and my computer DID NOT like that.
After getting the form, my next goal was to do some texture mapping. I had a some trouble here as well, but Ben helped me out in a bonus session, and explained to me that the pixel dimensions that rhino and shape diver work best with are ones that are a factor of 2. I bet the image I was using was not a factor of 2, which is why I was having some issues here.
But eventually I got the shape diver to work, which was dope! I added the QR code everyone to try it out.
Thanks for a great semester everyone one!


This first chunk of code here is how I made the dome shape with kangaroo. I got the bouncing jello affect to work a lot before I ran the code through the zombie saver below.
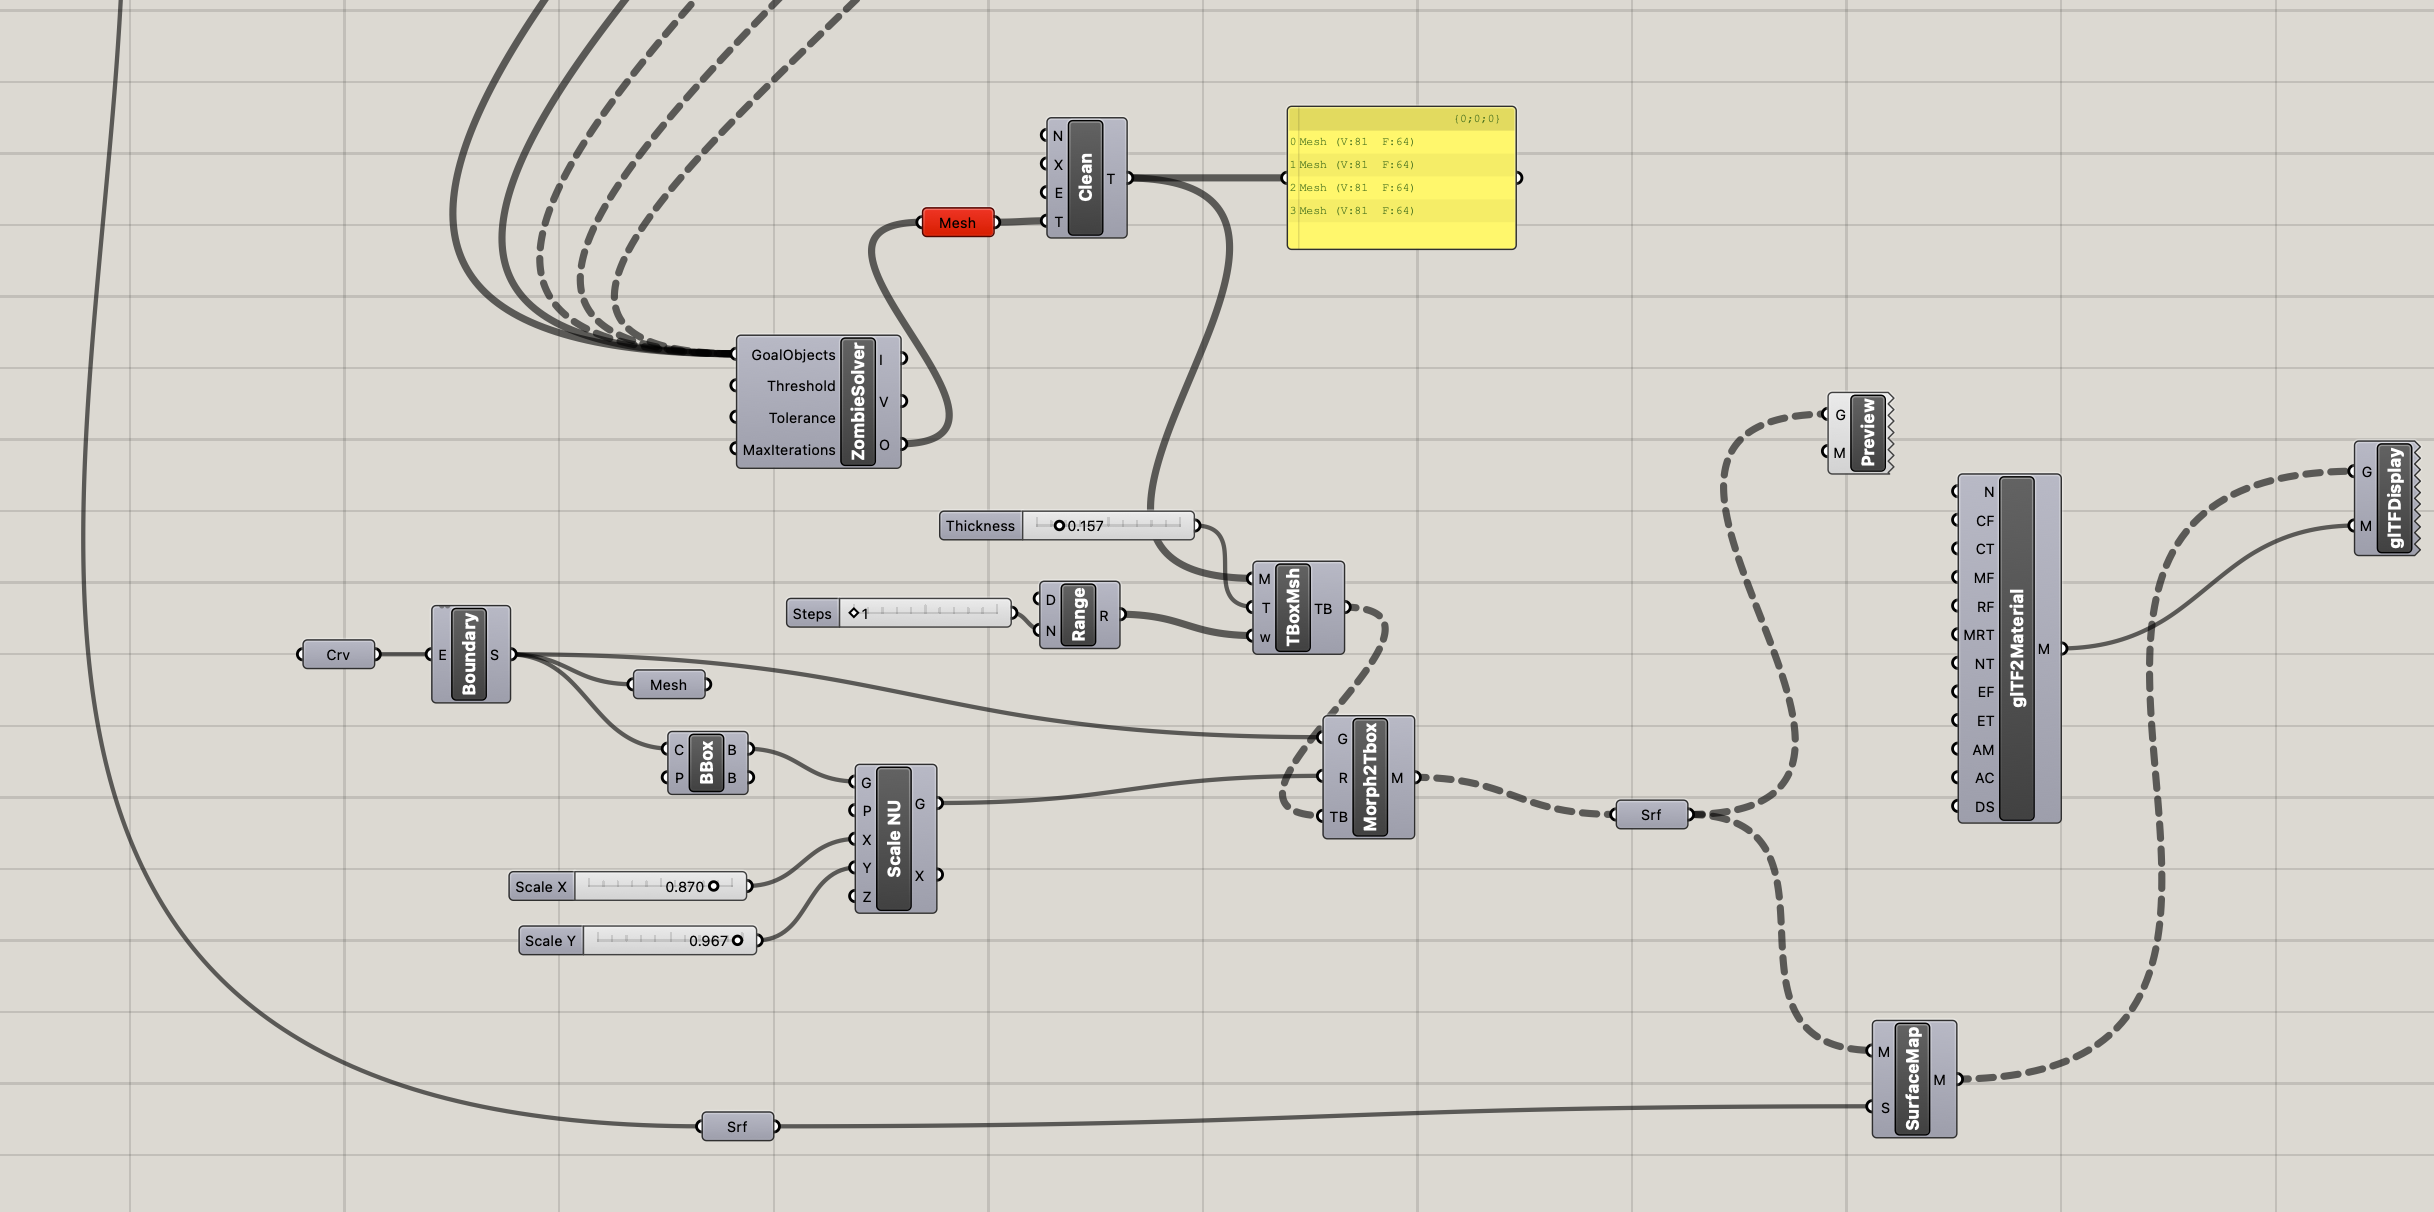
This bottom Chun of code is how I got the t-shirts to be individual units on the tensile structure.


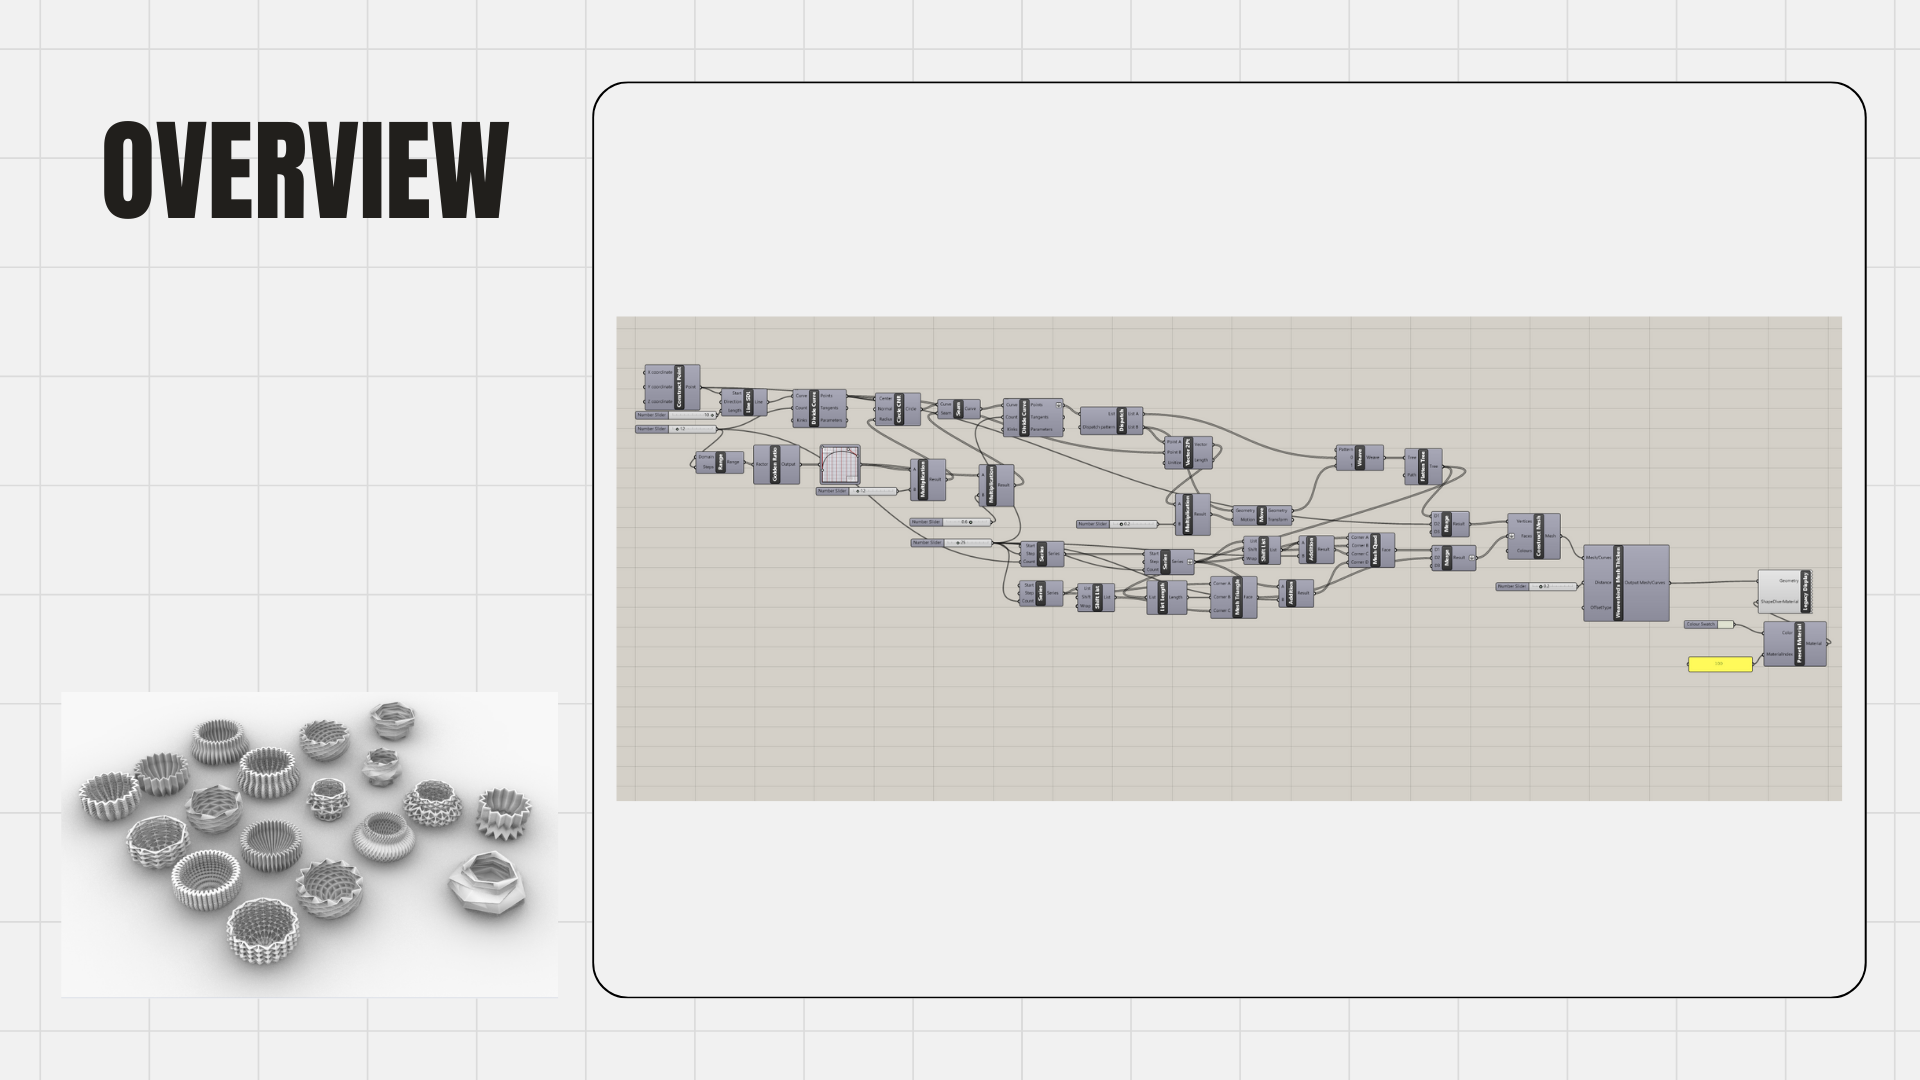
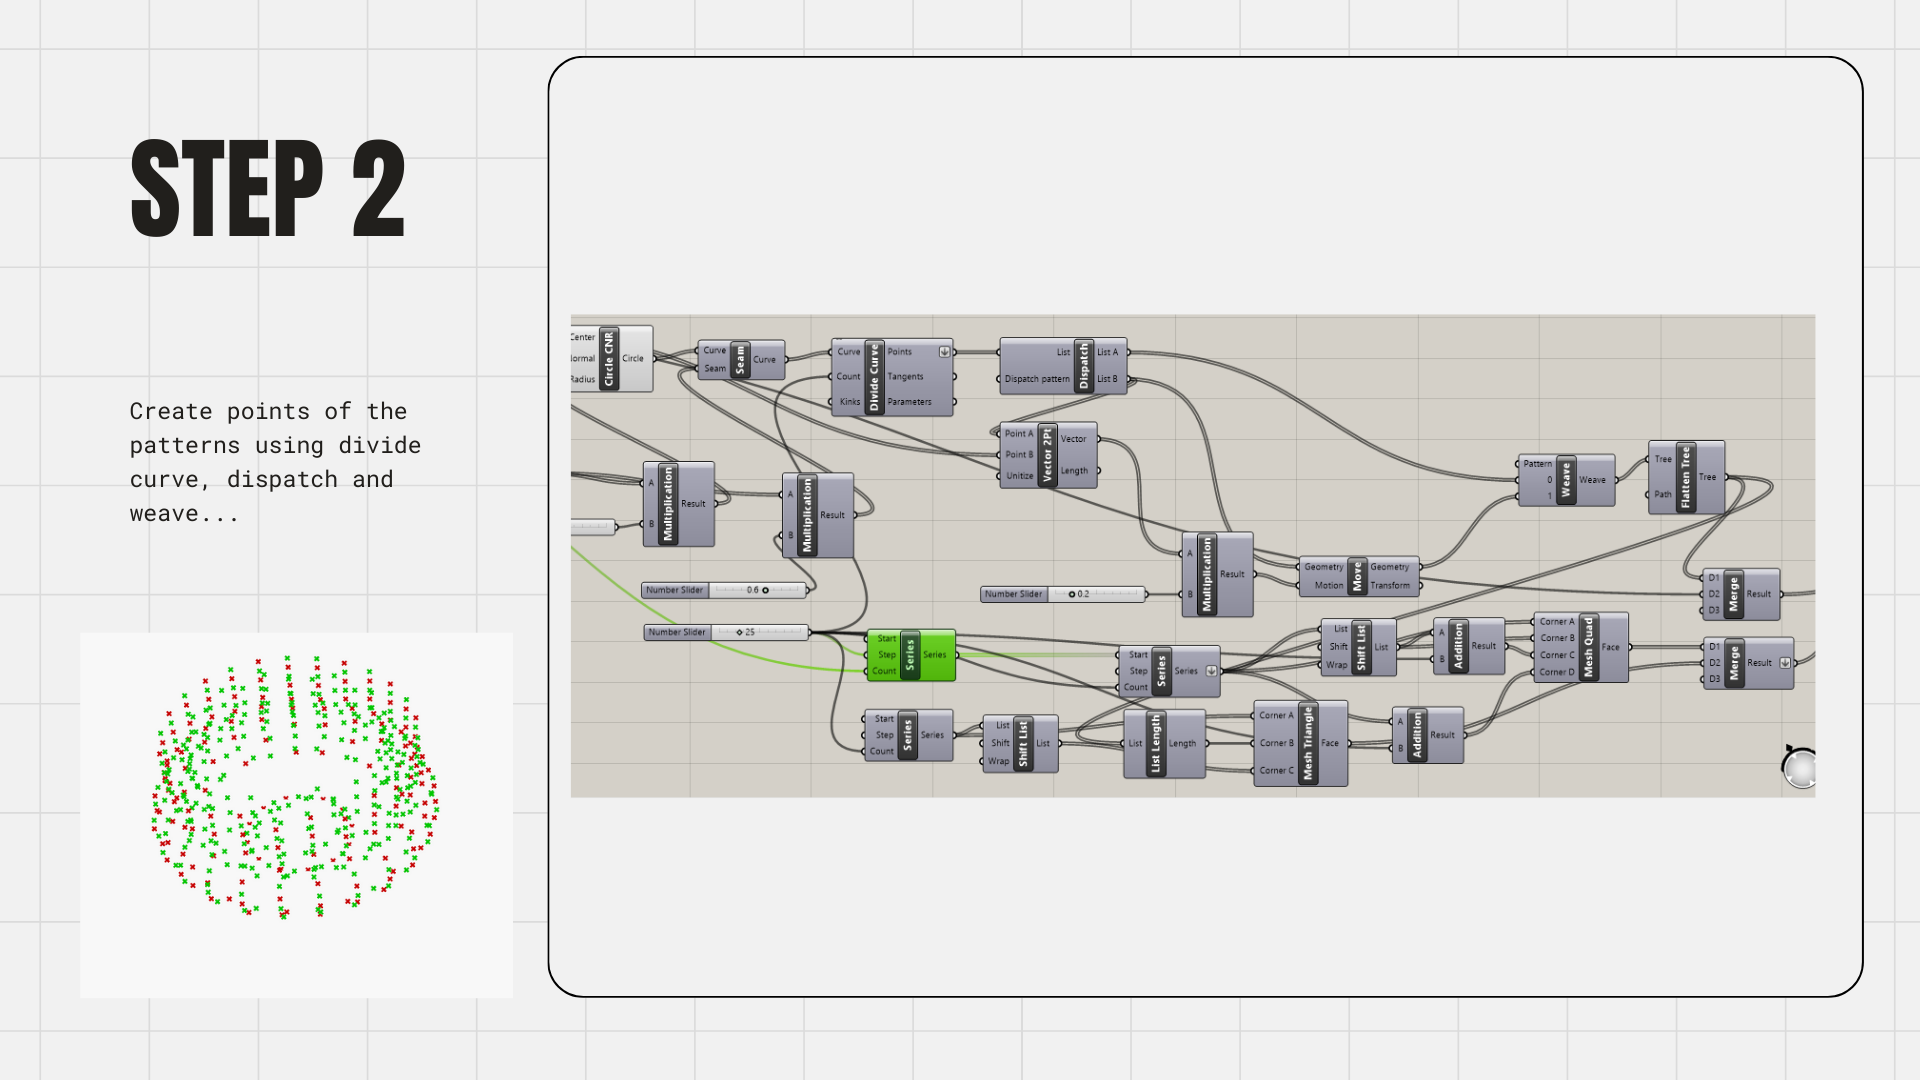
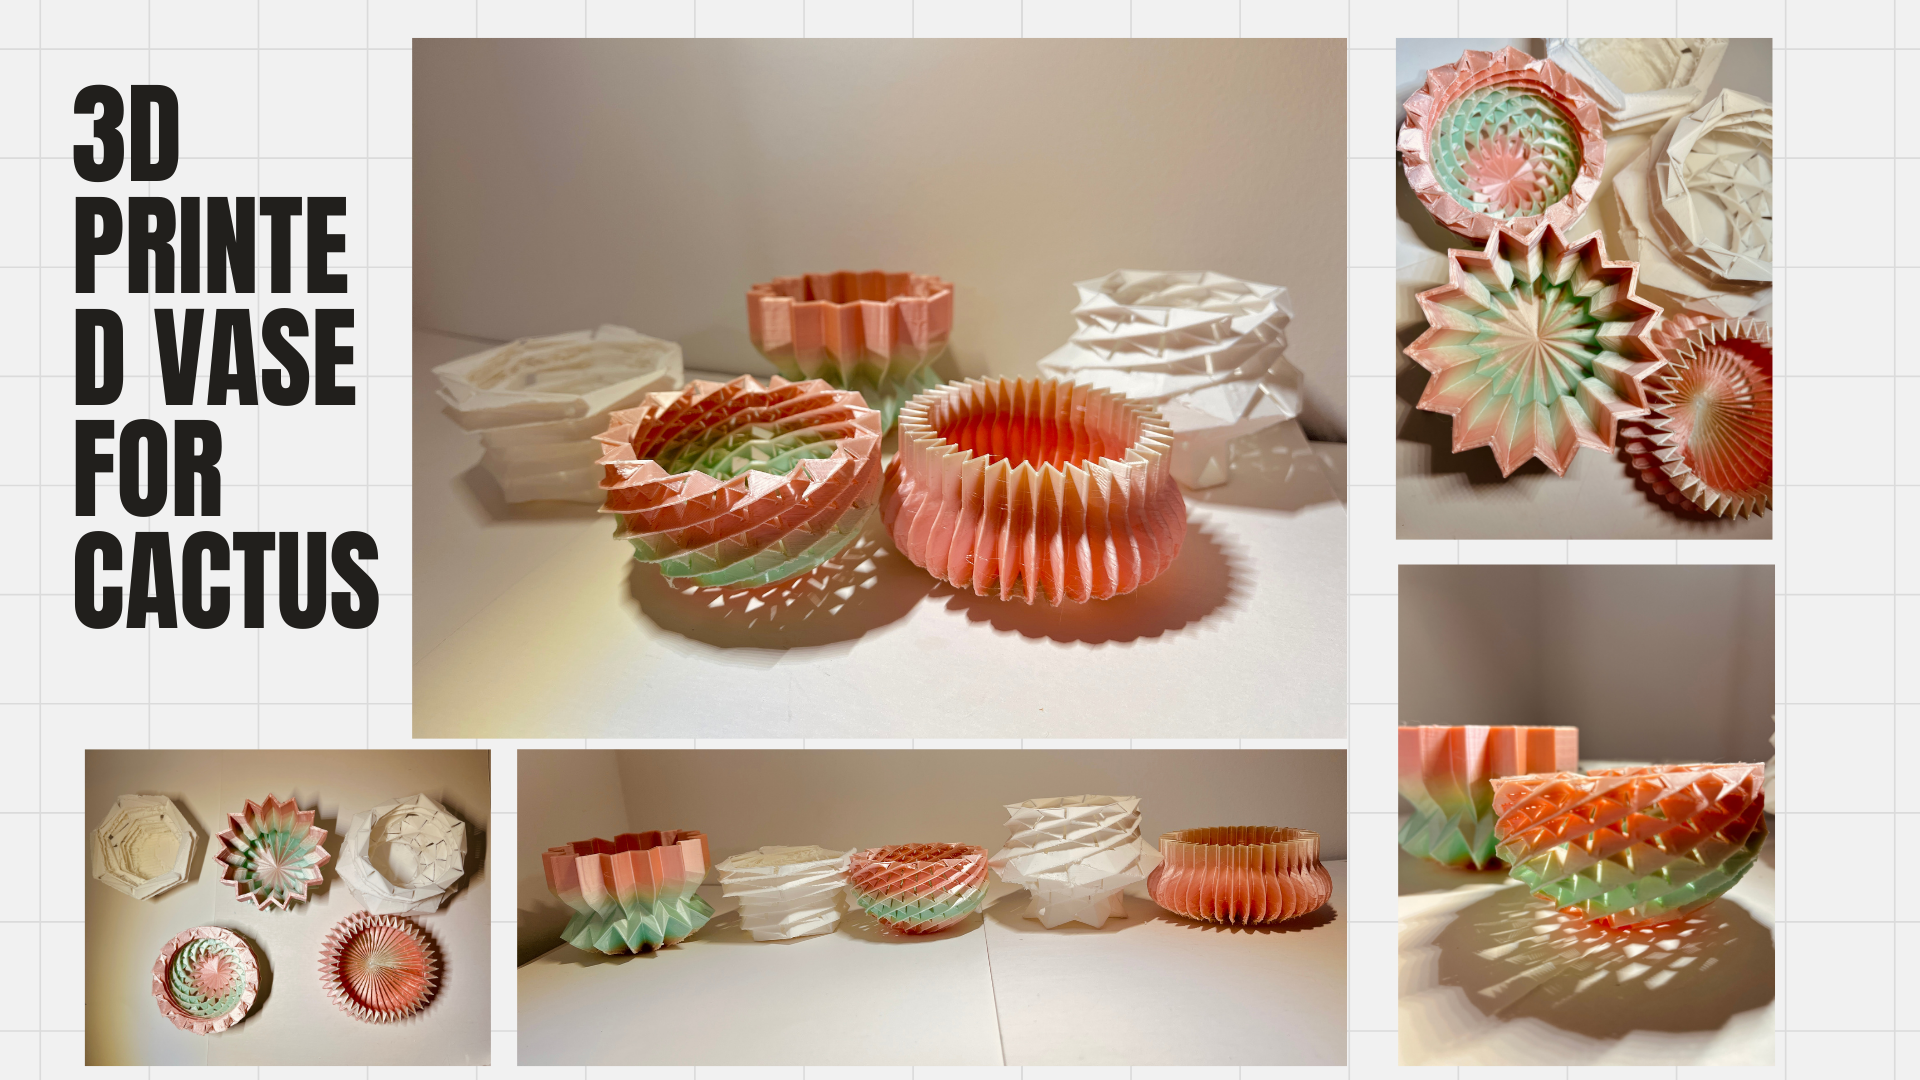
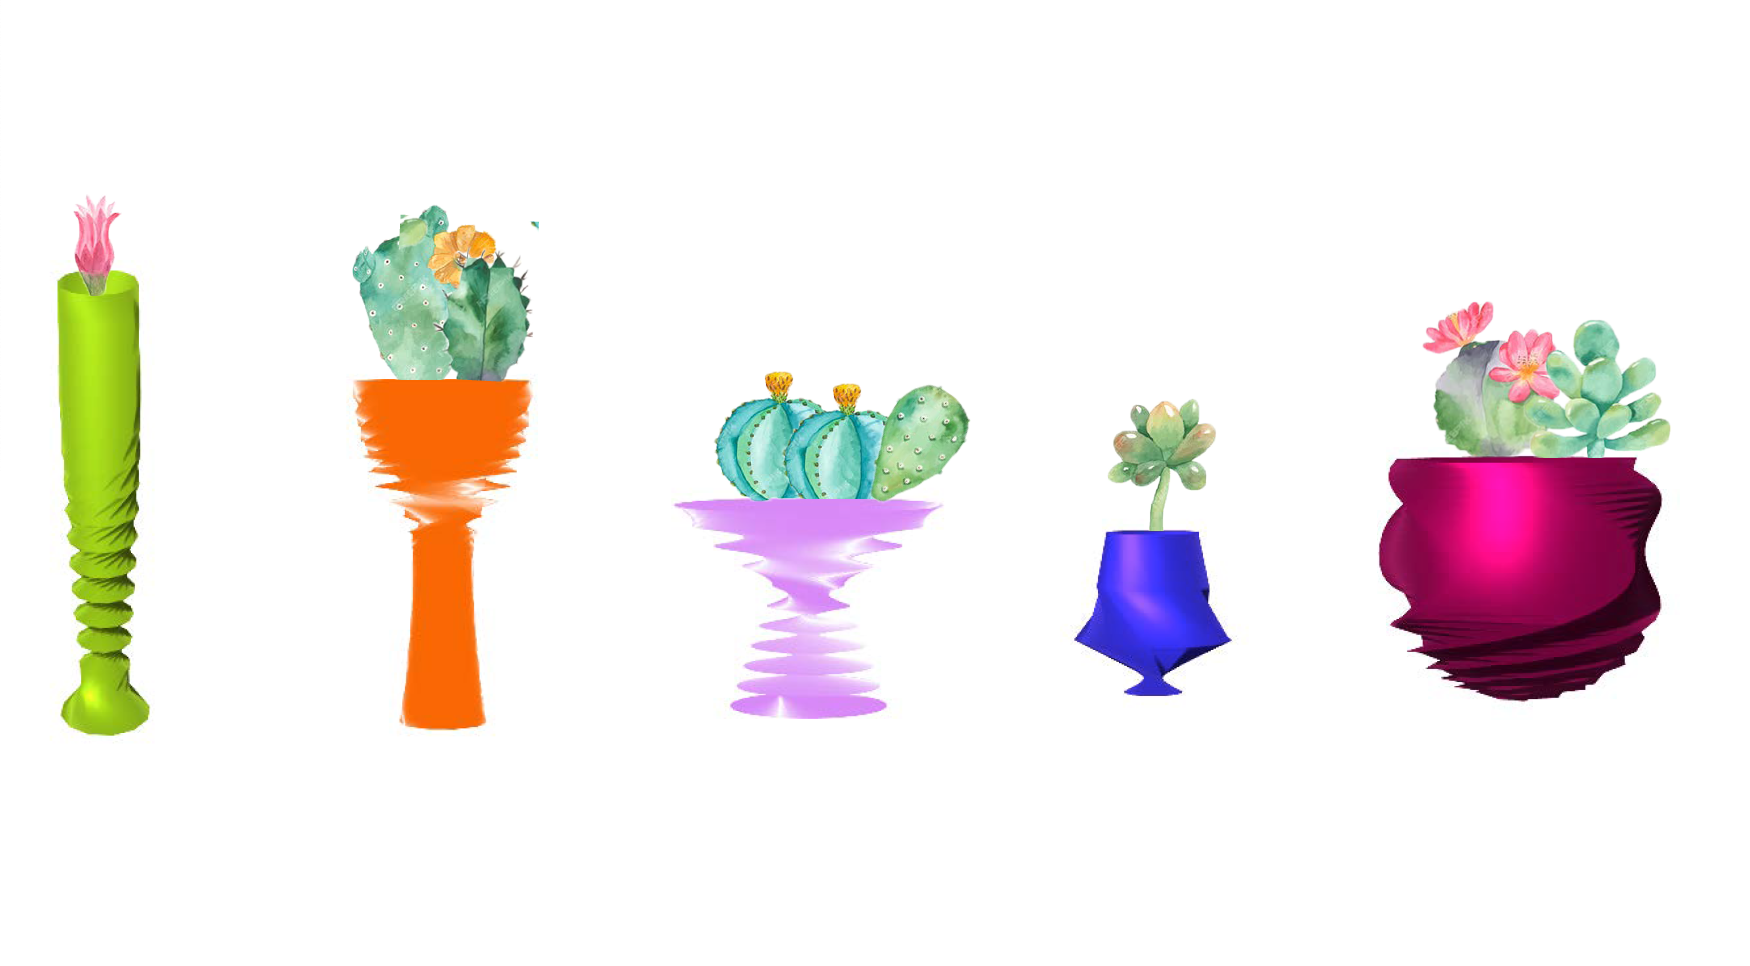
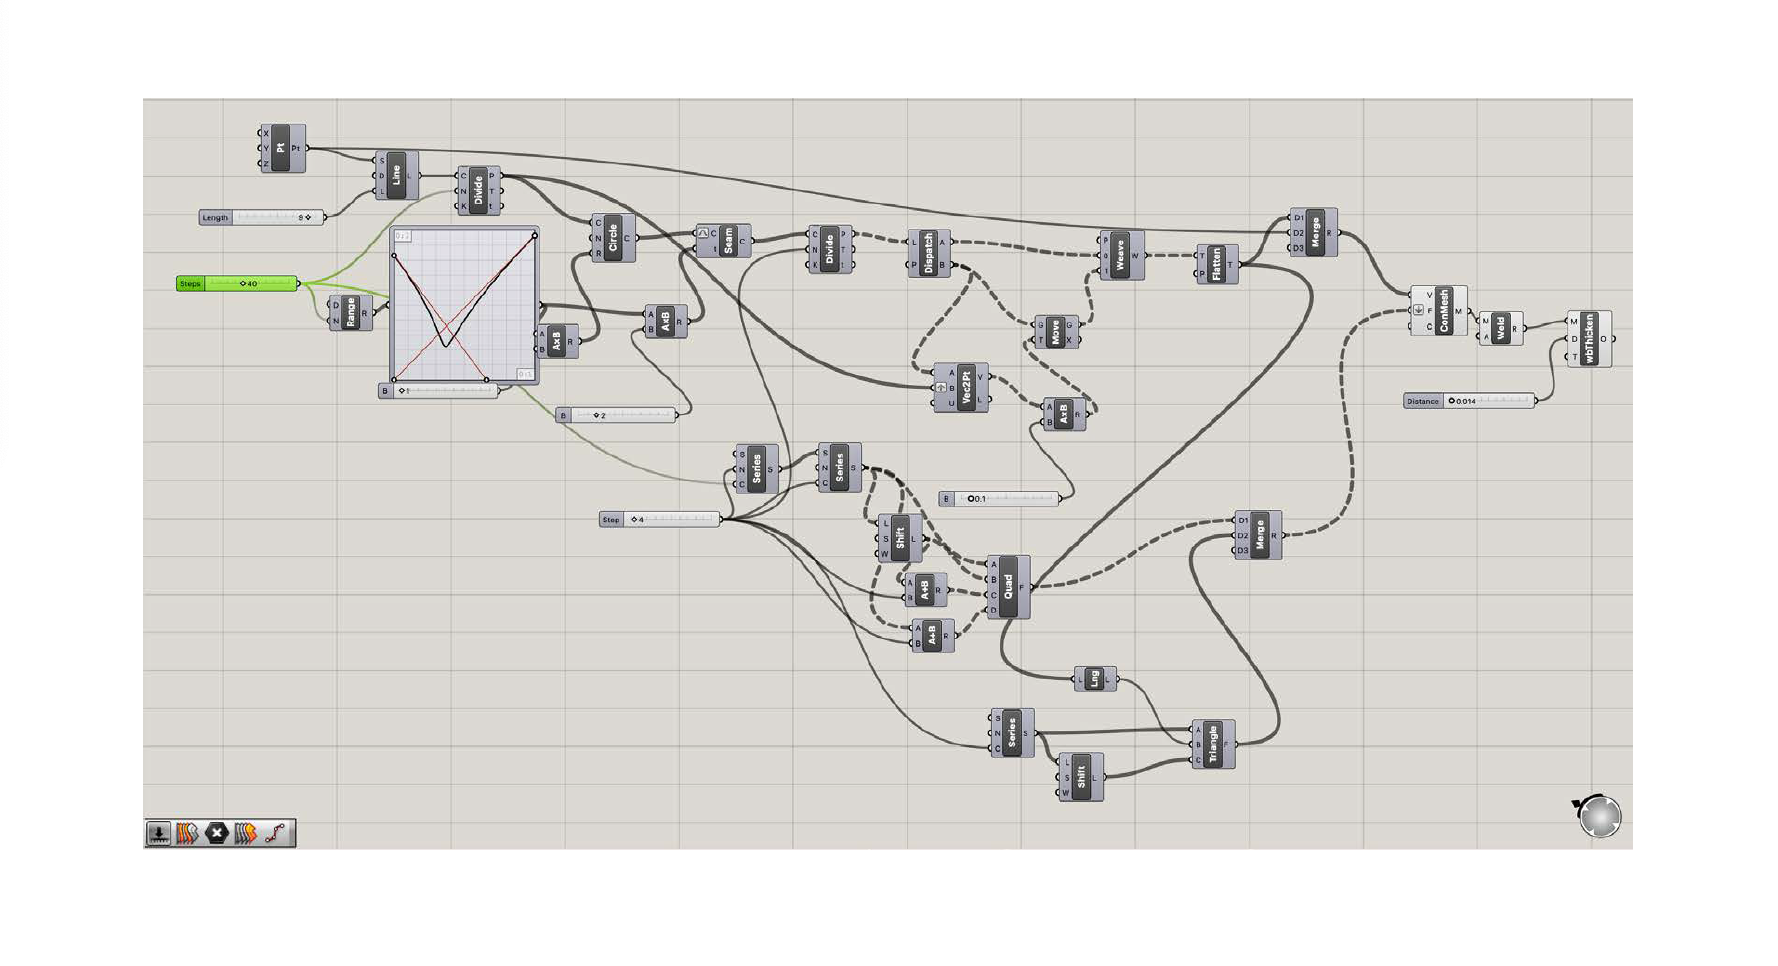
Hi everyone! For project 2 I was inspired by the different existing taxonomy of cocktail and wine glasses, so I started off with a tween through 5 different glass types. Upon further research though, I learned that you cannot eat or drink out of things that have been 3D printed because there are microscopic holes where bacteria can collect that can be harmful. So, I decided to keep my original idea, but make the cups for plants. Hence “Tipsy Planters”. The different cups can serve as a way to organize your plants by category the same ways drinks are. Additionally I decided to no do a tween though 5 different surfaces. Instead I made 1 long code, where I could use a bezier graph to control the the size and location for the stems and cup parts of the glasses.
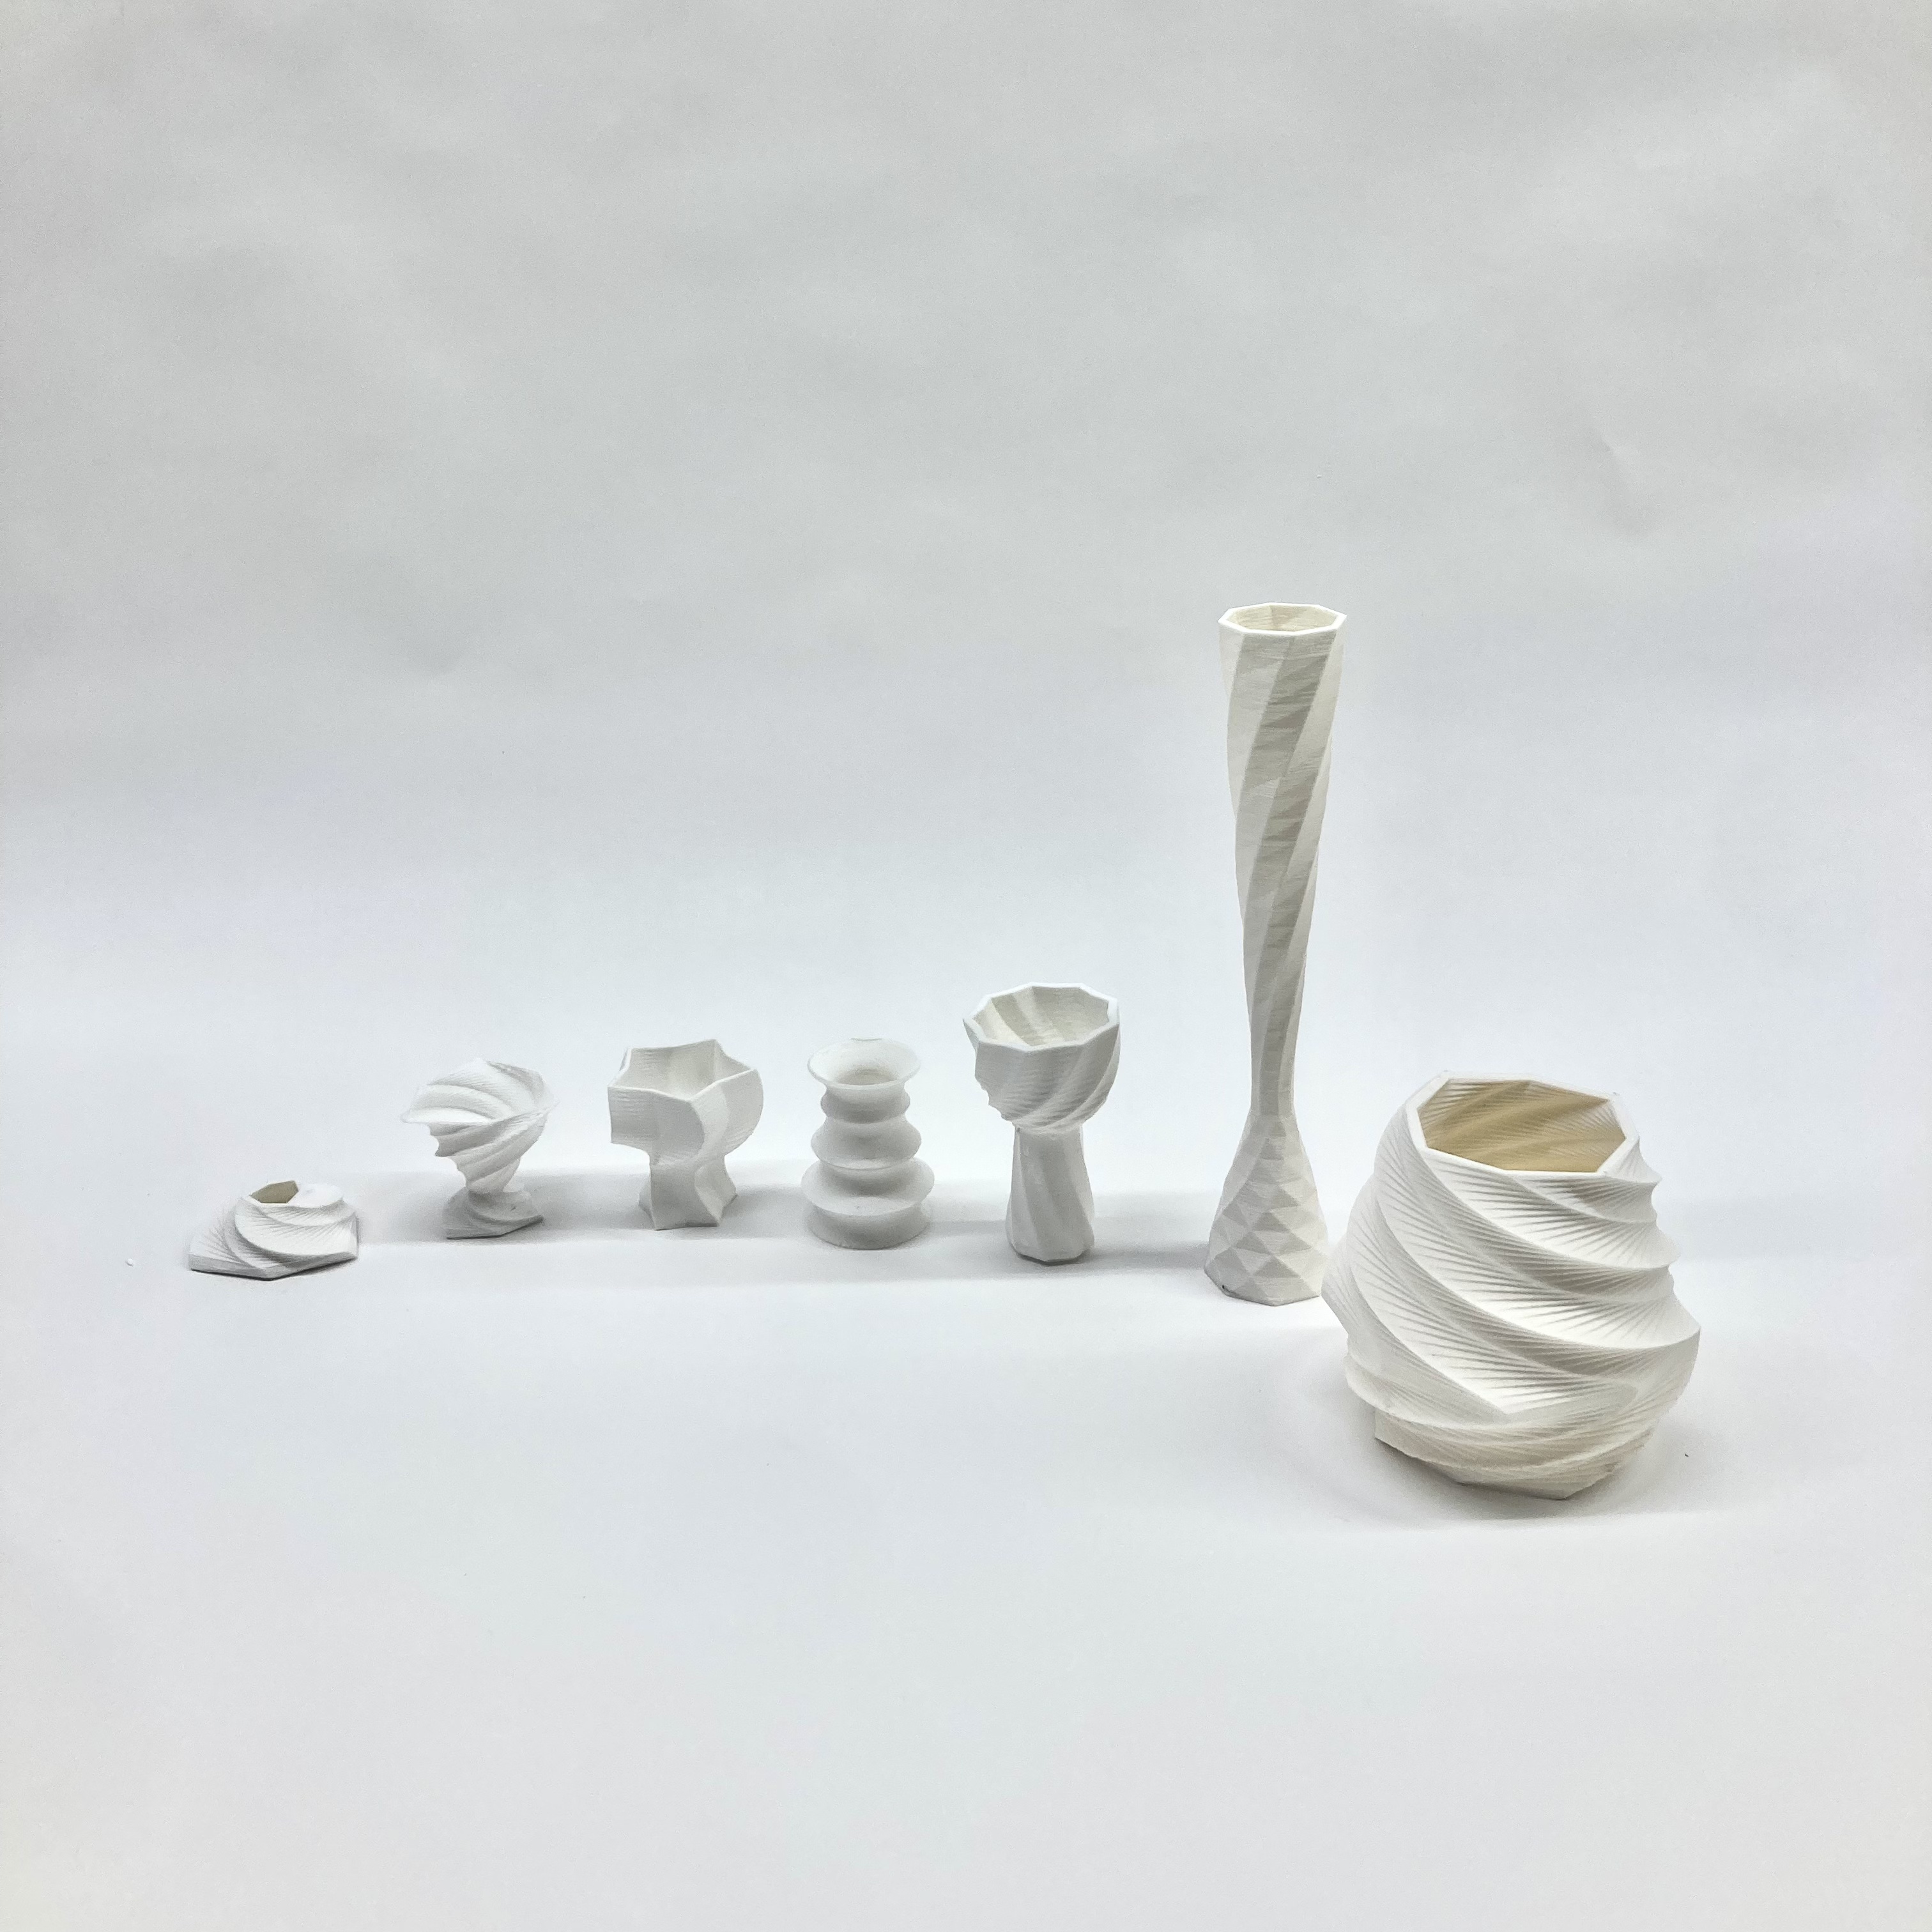
Learning to 3D print these was both fun and challenging. There was definitely a lot of trouble shooting, but I’m super happy to have the knowledge now. Also, when it worked and I got a beautiful print, it was extremely satisfying.
In my presentation, I used a colored metal for each cup rendering, and I don’t think it allows for people to actually see all the complexities the cups have. I messed around with different materials in rhino trying to get ones that show all the complexities of the slices, but nothing does the cups justice compared to the actual prints. Regardless, I added the more natural material shots I got. They do show the slices, but still not the degree I would want.
Anyway, this was a super fun project and I was super happy that we spent time learning to the 3D print. I think like many of my classmates, I’m itching to get one of my own now (I just don’t have the space in my apartment unfortunately).


Here is my project 2


Here is my project 1

AR video

Hi everyone! For project 1 my goal was to get a field of shapes of my choosing to follow an attractor point. I had the attractor point follow a swirly line over the grid. The cones around the point get smaller. I would have like to get it so that the tops of the cones, would almost flop away from the attractor point, but that was a bit advanced for my grasshopper knowledge at the beginning of the semester. At the beginning of the semester, I struggled a bit to get the materials I wanted, and to get the colors alternate every other pyramid figure, but I ended up working through it. I include the slides, a close up picture, the gif of the slides, and the grasshopper coding I used.
-Katy


You must be logged in to post a comment.